Page History
| Section |
|---|
| width | 75% |
|---|
|
|
|
Default Room List
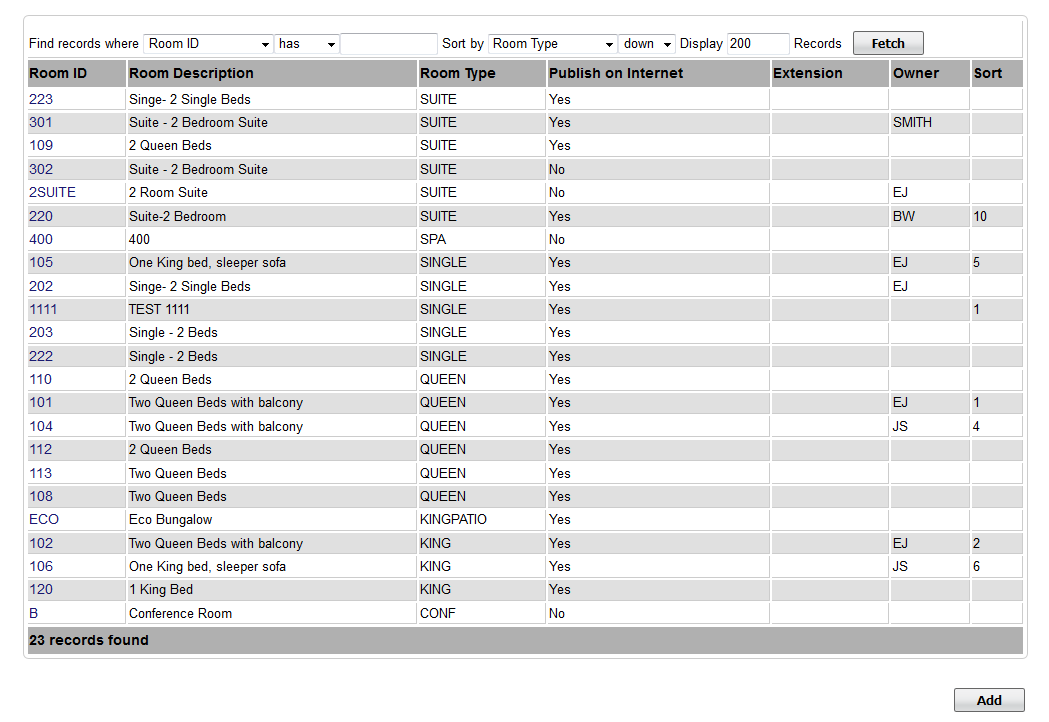
The Default Room List displays the following information:
- Room ID: I.D. for Internal use only and will not be viewed by guests. I.D. must be alpha/numeric only. Do not use punctuation, symbols or hyphens. Use a max. of 10 Characters, 5 characters or less is preferred. Enter the #, Room name letter or name that you use to identify the room. For example, 101, Room A, Romance Suite.
- Description: This will be visible tocustomer
Room Type: Choose the Room Type that this individual Room should be associated with.
- Publish to Internet: This controls whether or not the room is available through online booking channels and is enabled by default. In cases such as an hourly
- conferenceroom you may not want guests to be able to book it online. To avoid this simply select
- NO
- Extension: If you utilize Call Accounting or Comtrol please provide the accurate Phone Extension for each room type.

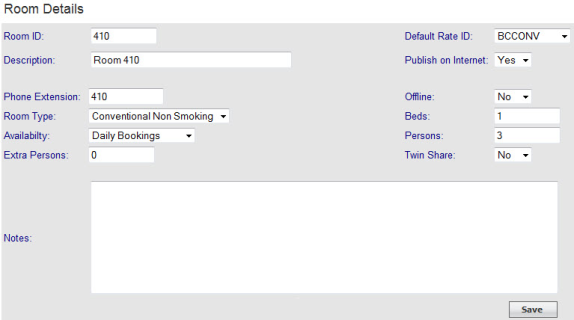
To add a new Room simply click Add, fill in the all fields and click Save as shown in the example below.
 *When you add or remove a room remember to modify your agent allocations so it's available to the desired channels. For more information see the Agent Allocations section of the setup area.
- Owner: If this an Owner Unit, choose the owner from the drop-down list. See Owner Units
- Sort: Enter the sort order of how the room will appear on the Tape Chart and on various Reports such as the Departures Report.
When setting up a new room you need to provide it a unique Room Id and description and assign it to the correct Room Type. The Publish to Internet flag controls if the room is available through online booking channels and is enabled by default. If you utilize Call Accounting or Comtrol please provide the accurate Phone Extension for each room type. See Add or Edit Rooms
| Column | |||||||||||||||||||||
|---|---|---|---|---|---|---|---|---|---|---|---|---|---|---|---|---|---|---|---|---|---|
| |||||||||||||||||||||
|
If you're looking for troubleshooting information, please try one of our Support Options!
| Section | |||
|---|---|---|---|
|
Need help? Submit a ticket
|
|
Step-by-step tutorials
|
Overview
Content Tools