Page History
| Section | ||
|---|---|---|
|
...
Applying Payments and Payment History
|
...
|
...
|
...
|
...
|
...
|
...
Account Statements
- Statement #:
- Open Folios
- Total
- Balance
- Statement:
| Column | ||
|---|---|---|
| ||
|
AR statements are easily managed with the MyPMS system. From the AR page you can directly export a statement to PDF, XSL, CSV format or click on HTML and the system will open the statement in a new printer friendly window.
...
|
| Section |
|---|
To see a summary of open balances for all companies by aging period, go to the Accounts Receivable Aging Report You will notice that the AR Account for each company has a "Non-Statemented Invoice": This functions as a "holding" statement to hold all folios with open balances not transferred to a specific statement. All open invoices or folio charged are added to this statement. See example below. Statements can be created to organize invoices by date range or payment period. You can create a new statement and then move folios to the designated statement. For example, you want to put all folio invoices for the last two weeks of November on one statement. First, create a new statement and then move the folios dated in that time range to the new folio. See AR Statements To apply payments to individual Statements follow these steps: Step 1: Show Statements (OPEN)
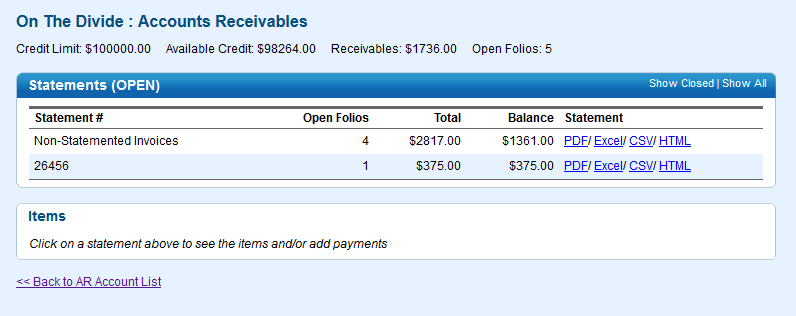
In this example, there are 5 open folios (4 in Non-Statemented Invoices and 1 in Invoice #26456) with a total balance of $1,736. Both have open folios and a balance due. The $ amount in the Total Column reflects the total amount of the folios charged to that Statement. The "Balance" column reflects what is still owing from the Company.
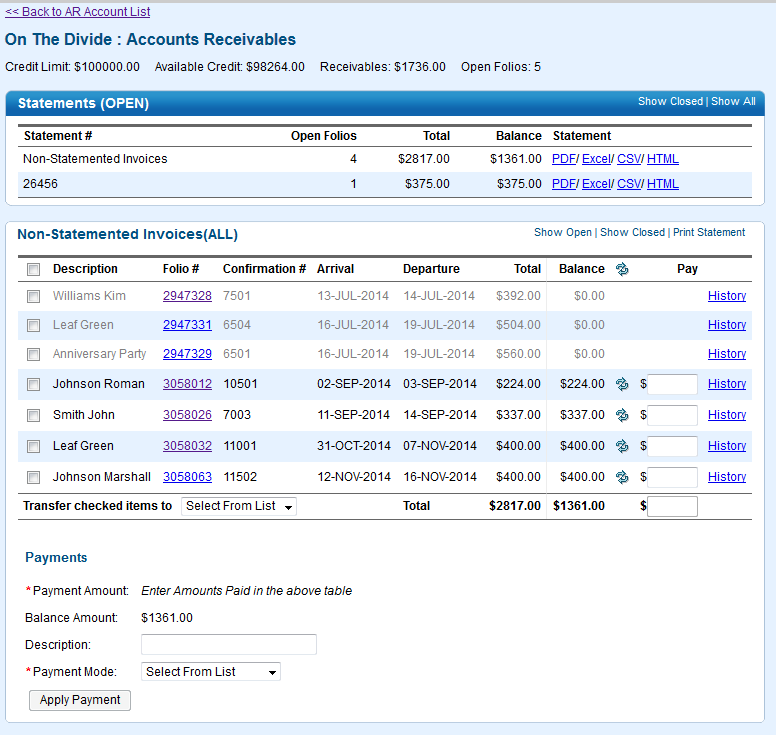
Step 2: Click on the Statement to apply payment: In this example, we clicked on Non-Statement Invoices with a balance of $1,361. Clicking on a statement will display the booking details, Total charged on that statement and Payment options below the list. It may have one or several line items associated with it. In this case, there are 4 bookings charged to this statement. Each folio Receivable can take a partial or full payment.
|
...
|
...
Step 3: Complete Payment Information *Payment Amount: $ amount of Total payment calculated from the $ amounts entered in the Pay column(s) Balance Amount: Amount of Balance due. Automatically calculated from Balance column.
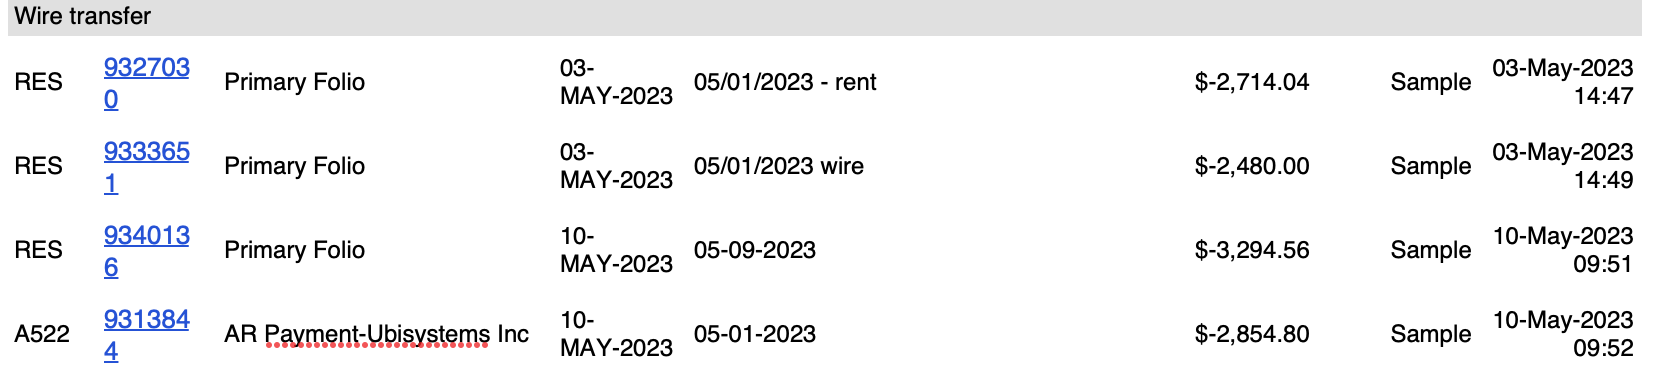
Transfer checked Items to: Transfer charges to a new statement by putting a check in the box next to the desired charges and selecting New Statement from the Transfer checked items to drop down. The system will automatically create a new statement and move all selected charges and a new statement will show up under the AR account. Tracking AR Payments via the Transaction and Manager's reportsWhen you take payment for an Account Receivables account, that payment records in two places:
|

| Column | |||||||||||||||||||
|---|---|---|---|---|---|---|---|---|---|---|---|---|---|---|---|---|---|---|---|
| |||||||||||||||||||
|
If you're looking for troubleshooting information, please try one of our Support Options!
| Section | |||||||||||||||
|---|---|---|---|---|---|---|---|---|---|---|---|---|---|---|---|
|
...
Overview
Content Tools